Editor#
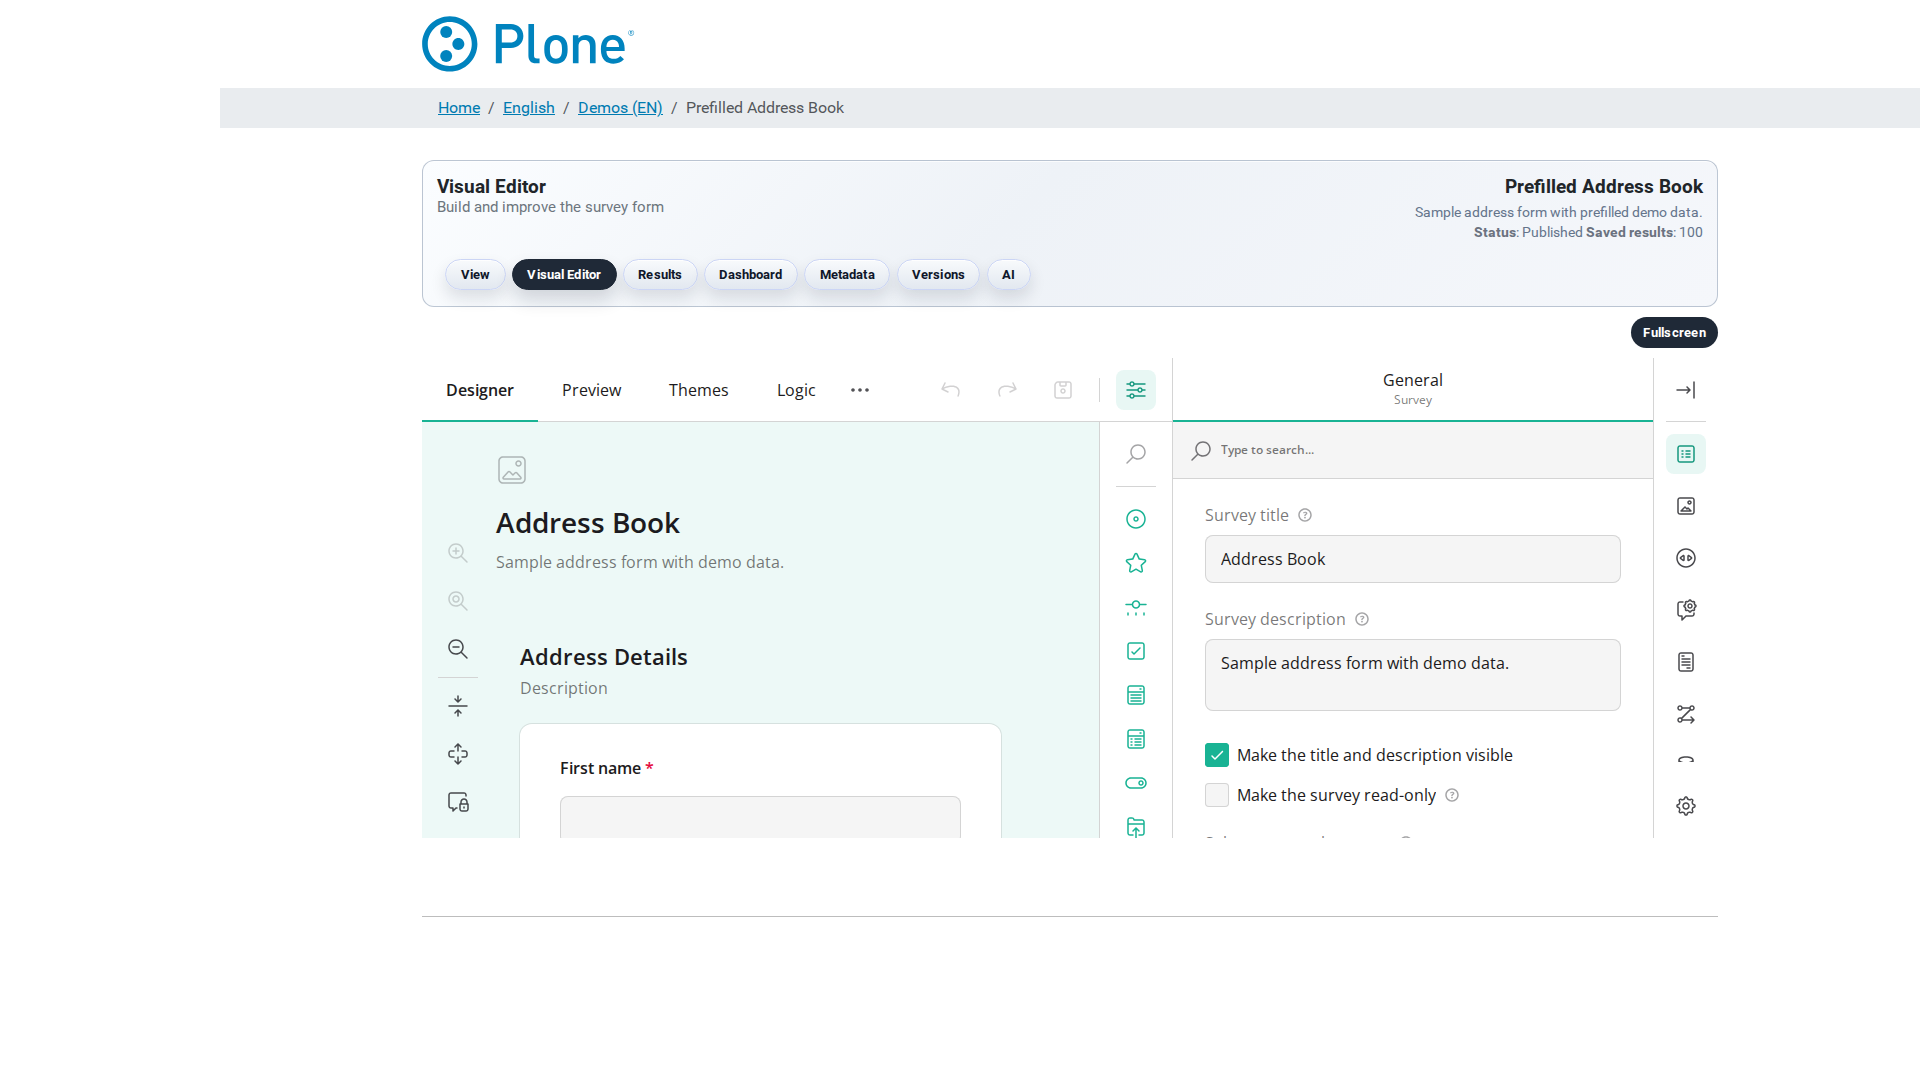
The visual editor (@@editor) embeds the SurveyJS Creator — the
full drag-and-drop design tool for building the survey form. You add
questions, arrange pages, configure validation and logic, and preview the
result. The editor is where the form takes shape; every save creates a new
form version, so you can always go back (see Form Versions).
How to get here#
From the survey landing page, click Visual Editor.
Directly at
/my-survey/@@editor.The editor requires the Modify portal content permission (Editor role or higher).
What you see#
Survey header — the shared survey navigation (View, Visual Editor, Results, …) with the headline “Visual Editor — Build and refine the survey form.”
Fullscreen toggle — expands the editor to the full browser window so the design area gets maximum space.
Unsaved changes banner — a slim banner appears as soon as you have edits that have not been saved yet, so you do not lose work when navigating away.
The SurveyJS Creator — the classic three-region layout:
Toolbox (left) — the palette of question types. Drag a question onto the design area to add it (single choice, multiple choice, dropdown, text, long text, rating, matrix, panels, dynamic panels, file upload, signature, date/time, and more).
Designer (center) — the survey page under construction. Select a question to edit it, drag to reorder, use the hover toolbar to duplicate or delete.
Property Grid (right) — the settings of the selected element: title, name, validation (required, minimum, maximum, regex), layout, logic (visible-if conditions), choices for choice questions, defaults and much more.
The Creator offers the usual modes via its top tabs: Designer, Preview (interactive test run of the current design) and JSON (the raw SurveyJS schema, editable by hand).
License notice — until a SurveyJS license key is configured in the global Forms settings, the editor shows a notice about SurveyJS licensing (the Creator and Dashboard components require a license for production use; a license covers your developers, not your respondents).
What you can do#
Build a form step by step#
Add a page — use the page tools to create the survey’s pages (sections). Typical forms use one page per topic.
Drag questions from the toolbox onto the page.
Select the question and configure it in the property grid: set the question text, the field name, validation rules and any logic.
Arrange the questions: drag them into the desired order, or use the toolbar buttons to duplicate/delete.
Preview the result with the Creator’s Preview tab — this is the same SurveyJS engine the public viewer uses.
Save — the form is submitted as JSON and stored as a new form version (see Form Versions).
Edit an existing form#
Open
@@editor— the current form is loaded automatically.Make your changes (the banner reminds you that they are unsaved).
Save. A new version is created; the previous versions remain in history, so you can restore them at any time.
Design tips#
Set meaningful field names — the field
nameis what appears in results, exports, mail attachments and POST payloads. Descriptive names (first_name,consent_gdpr) make the data readable everywhere.Use validation — required questions, min/max lengths and regex patterns are enforced in the browser and re-checked on the server (Force Server Side Validation is on by default).
Test the JSON tab carefully — hand-edited JSON must stay valid SurveyJS; the save endpoint validates the payload before storing it.
Save early, save often — versions are cheap; you can always restore.
Tips & notes#
The editor loads the survey’s configured languages; the UI language of the editor follows the Plone site language.
Every save creates a version — there is no “overwrite”. This is deliberate: version history is the safety net for design experiments.
If the license notice is shown, the Creator still works in the demo; configure a license key under Site Setup > Forms → General to remove the notice for production use (see Global options).